Friday 7 March 2014

Vertical farming explained: how cities could be food producers of the future


Growing food in population centres would increase yields, cut transport costs and overcome limited land area


The Observer, Thursday 6 February 2014 10.30 GMT
Vertical farming overcomes a limited land area. Photograph: Observer

Populations are growing and cities are booming – but could we soon see skyscrapers turned into centres for crop production? From Chicago warehouses to the south pole growth chamber in Antarctica, the concept of growing food indoors is catching on. Plant scientist Dr Erik Murchie, from the University of Nottingham, reveals how agriculture could be turned on its head.

What is vertical farming?

It's vertical because you are trying to grow more crops on a smaller land area and this usually means going upwards into buildings. It normally means that, instead of having a single layer of crops over a large land area, you have stacks of crops going upwards. It's also associated with city farming and urban farming.

Why do we need it?

It is the need to increase crop yield without increasing the land area for crops. If we can move some of that away from the countryside into the city, and get some of that food production close to the high concentrations of population, then we can make a real impact. People want to do it as well – it puts the food supply in the control of people living in the cities.

How high are we talking – skyscrapers?

The beauty of vertical farming is that you can go as high as you want – if you have a system that works efficiently. The only risk with that is getting things that plants need like water and nutrients up there. And you need a way of getting your product out efficiently.

Can we grow all crops like this?

Wheat, maize and rice – these things that provide the bulk of our calories- will be very difficult to grow on a vertical farm because you need to accumulate a massive biomass for those crops - you might expect typically anything between 5 and 12 tonnes per hectare of grain from something like wheat, but to do that you have to accumulate upwards of 20 tonnes per hectare of dry weight of plant. So it's the weight of the plant. The crops that are likely to be grown are high-value nutritious crops – like tomatoes, lettuces, green crops.

What's holding us back?

Energy will be the great limiting factor for this. Plants need a lot of light for photosynthesis. There's a couple of examples in the US of warehouses being converted into stacks of plants. They use LED lights which are cool, efficient lights you can put close to the plants. They are very efficient at making plants grow and you can control plant growth very well, but again you need energy to do that.

How do you see this developing?

What will drive it is technology – the technology to have new buildings, or convert old buildings, where you can have high concentrations of plants; where you can get enough light in there for the plants to grow, and have the recycling of water and nutrients.

You don't need soil for this, you can do it hydroponically. It's good to keep soil out of it, then you can keep it clean and control the nutrient cycling and water cycling very efficiently. There is plenty of opportunity for biological control of pests and diseases.

How to Make a Simple 5 Gallon Bucket Aeroponics System


Aeroponics is growing plants in a mist environment. Unlike traditional aquaponics and hydroponics, the plants are suspended without grow medium. Here is a 5 gallon bucket aeroponic system that is easy to make.

The 5 gallon bucket aeroponic system is very simple to make and operate. It was designed to provide a compact and inexpensive way to grow food using 5 gallon food-grade buckets. The unit is only filled with less than 2 gallons of water, so it is much easier to transport than the popular 30 gallon tote aeroponics model.

Aeroponics is a really simple and worry-free way to grow and clone veggies and herbs. Aeroponics is growing vegetation without soil, but the roots are suspended and sprayed with water and/or nutrient solution. It is a worry-free way to clone most non-woody stemmed plants from cuttings. You can also grow plants to harvest in the system as well.

How to Grow with Aeroponics

There is no big secret, growing with aeroponics is another form of regular hydroponics. Purchase your favorite hydroponic solution from the hydro supply stores and follow the directions on the label. It is pretty simple to follow. You should be expected to drain the water and add more nutrient solution every couple of weeks as needed. Aeroponics and hydroponics uses more water and resources than aquaponics.

How to Clone with Aeroponics

Cloning with aeroponics is a better method than conventional soil root cuttings. It is quickly becoming the preferred method of cloning. With cloning from cutting with aeroponics you do not need to add any nutrients to your water. You do not have to flush your water as long as the water quality stays clean. It is a much more sterile way to clone than soil cuttings. We just add tap water, let it run for an hour to let the chlorine evaporate, and then start cloning.

Materials

The materials for the aeroponics system: 
(1) 5 Gallon Food-Grade Bucket with Lid 
(1) 1/2″ X 12″ cut-off threaded poly riser 
(1) 360 degree 1/2″ platic head threaded sprinkler heads 
(1) 317 gallon per hour (or equivalent) 1/2″ threaded Hydroponics Pump 
(1) Indoor/Outdoor Electrical Timer with 30 Minute Increments 
(7 or desired amount) Hydroponic Net Pots with Rubber Foam Lids – You can use any size and quantity you want depending on the plants you are growing. We used seven 3″ net pots with lids. 
Tools 
Saw to cut poly riser 
Sharpie 
Hole Saw – Appropriate size for desired net pots. If you are using 3″ net pots, use a 2 7/8″ or 2 3/4″ hole saw. 
Drill for hole saw 
Safety Glasses 

Instructional Video

Class: How to Make a 5 Gallon Bucket Aeroponics System

Recorded LIVE

Who: Dennis McClung

When: October 19th, 2013

Where: Honeyville Farms in Chandler, AZ

Length: 30 minutes

This class was recorded live in a classroom setting. To be a part of our classes in person, join our meetup group. Click here to see pictures from the class.

Instructions

Decide what size net pots you wish to use. The pots should be spaced equally apart, away from the edge, as shown. We used seven 3 


Carefully cut your holes for your net pots using a drill and hole saw. The net pots should fit snugly in to the holes and not fall through. 


Screw the threaded poly cut-off riser to the hydroponic pump. Cut the threaded riser to desired height and add the threaded 360 sprinkler head. Add pump with riser and sprinkler head in to bottom of bucket. Hydro pumps with suction cups and pre-filters are best. 


Run the pump plug through a net pot hole and plug in to a timer. Set the timer for 30 minutes on and 30 minutes off. Fill with 2 gallons of water, add cuttings, and let the fun begin!

How to Make a Simple Aeroponics System


Aeroponics is growing plants in a mist environment. Unlike traditional aquaponics and hydroponics, the plants are suspended without grow medium such as hydroton. Here is the inside of the aeroponics system.

Aeroponics is a really simple and worry-free way to grow and clone veggies and herbs. Aeroponics is growing vegetation without soil, but the roots are suspended and sprayed with water and/or nutrient solution. It is a worry-free way to clone most non-woody stemmed plants from cuttings. You can also grow plants to harvest in the system as well.


The aeroponics system cloning our favorite tomatoes. Tomatoes take around one week to develop roots from cuttings. In two weeks they can be transplanted or continue to grow in the aeroponics system with nutrient solution.

Many folks have seen the aeroponics system we designed at the Garden Pool and we have decided to share our design. It is easy to both build and operate. The project takes about 30 minutes to build and only costs around $70 in materials. If you are cloning, it requires just tap water. If you are growing to harvest, then you can add hydroponic nutrient solution. We have our units sitting on our back patio and have cloned and grown mint, tomatoes, lettuce, and much more. The system we design can be built by anyone for a fraction of the price of comparable commercial units.

How to Grow with Aeroponics

There is no big secret, growing with aeroponics is another form of regular hydroponics. Purchase your favorite hydroponic solution from the hydro supply stores and follow the directions on the label. It is pretty simple to follow. You should be expected to drain the water and add more nutrient solution every couple of weeks as needed. Aeroponics and hydroponics uses more water and resources than aquaponics.
How to Clone with Aeroponics

Cloning with aeroponics is a better method than conventional soil root cuttings. It is quickly becoming the preferred method of cloning. With cloning from cutting with aeroponics you do not need to add any nutrients to your water. You do not have to flush your water as long as the water quality stays clean. It is a much more sterile way to clone than soil cuttings. We just add tap water, let it run for an hour to let the chlorine evaporate, and then start cloning. Here is a detailed video about cloning with aeroponics. The info about aeroponic cloning starts at 5:40 on the video.

Materials

The materials for the aeroponics system.
(1) 30 Gallon Tote with Lid
(6) 3/4″ slip to 1/2″ threaded PVC connectors
(1) 3/4″ slip “T” connector with 1/2″ threaded top.
(1) 1/2″ threaded bulkhead fitting with gasket.
(1) 1/2″ barb to male threaded connector.
(77″) 3/4″ PVC
(2) 3/4″ slip “T” PVC connector
(6) 180 degree 1/2″ plastic head threaded sprinkler heads
(1) 12″ black flexi-tubing
(1) 1/2″ hose clamp
(1) 1/2″ flexi-tubing shut off valve
(1) 200 gallon per hour (or equivalent) Fountain Pump
(1) Tube of 100% Silicon Caulking
(1) 3/4″ slip “cross” PVC connector
(6) 3/4″ slip “elbow” PVC connector
(1) Indoor/Outdoor Electrical Timer with 30 Minute Increments
(6 or desired amount) Hydroponic Net Pots with Rubber Foam Lids – You can use any size and quantity you want depending on the plants you are growing. We used six 3.75″ net pots with lids.
Tools
Caulking Gun
Saw to cut PVC
PVC Primer & Glue
Hole Saw – Appropriate size for desired net pots & bulkhead fitting
Drill for hole saw
Teflon Tape
Tape Measure
Safety Glasses
Utility or hobby knife (if you do not wish to use the drill and hole saw)
Instructional Video

Class: How to Make a Simple Aeroponics System
Recorded LIVE
Who: Dennis McClung
When: July 21st, 2012
Where: The Garden Pool in Mesa, AZ
Length: 48 minutes

Instructions

Decide what size net pots you wish to use. The pots should be spaced a few inches apart. We used six 3.75" net pots as we will use primarily to clone tomatoes. Use many smaller pots for smaller crops.


Carefully cut your holes for your net pots. You can carefully use an exacto knife instead of the drill and hole saw. The net pots should fit snugly in to the holes and not fall through.


Cut the 3'4" PVC as follows: (6) 4.5", (6) 6", (1) 8", (2) 3".


Using the pvc glue and primer, connect the 4.5" PVC pieces to the PVC elbow connector and the 6" PVC pieces as shown. the 6" piece will serve as the riser.


Using the PVC primer and glue, attach the 3/4" slip to 1/2" threaded PVC connector. Screw in the sprinkler heads as shown.


Using the PVC Primer and glue, connect two 3/4" "T" PVC connectors and one 3/4" "cross" PVC connector as shown.


Connect the two 3" PVC pieces to the 3/4" "T" with the threaded 1/2" top. Also connect the 8" section to the risers. Screw in the 1/2" barb to 1/2" threaded connector.


Place the PVC sprinkler unit inside the tote. Connect the fountain pump to the PVC unit with the 1/2" flexi-tubing. Make sure there are no kinks in the tubing.


Using the entire tube of silicone caulking, seal the lid on top of the aeroponics system. Make sure that the seal is airtight with no gaps of coverage. Let completely cure and dry before using. Install the bulkhead fitting at the desired location along the bottom of the unit. Attach the shut off valve with flexi-tubing as a drain valve.


Insert the net pots with foam lids. We place our unit on a timed cycle of 30 minutes on and 30 minutes off. Fill with water to just below the sprinkler heads.


The pump and/or air tubing is placed in on of the net pot holes. Your fountain pump should be able to easily fit through the hole. Check before sealing the aeroponics lid.


A 1020 humidity dome helps young cuttings by keeping a more humid environment.

Urban farming: cultivating real change in Cape Town


For many a Mother City resident, food is something taken for granted. It comes steaming off our mothers’ stovetops as children, and flies off supermarket shelves and swanky restaurant menus in our later years.

But more so than ever before, with meat mislabelling scandals having rocked Europe and South Africa in 2013, people are becoming increasingly hesitant to simply accept fare with open mouths. Those who, in the past, couldn’t care less are beginning to ask pertinent questions about where their food comes from, what it contains, how it’s cultivated and produced and just what the broader consequences are of importing truckloads of it from regions miles beyond the city’s borders.

These concerns about transparency are certainly a welcome change, but even so, such questions are still a luxury of the affluent, especially in a Cape Town where issues around food insecurity far outweigh those around food integrity. That is, with poverty still a major dilemma, a significant number of starving Capetonians are less anxious about where their meals comes from and more concerned about whether their meals come at all. To offer up one shocking statistic, a 2011 report compiled by Dr Jane Battersby showed that an average of 80% of households surveyed in select township areas lack access to sufficient provisions and often go hungry.

In both cases though, the problem essentially comes down to our heavy reliance on external sources for grub. It’s only logical then that a selection of initiatives committed to putting the power of food production back into the hands of the people have sprung up in Cape Town over time.

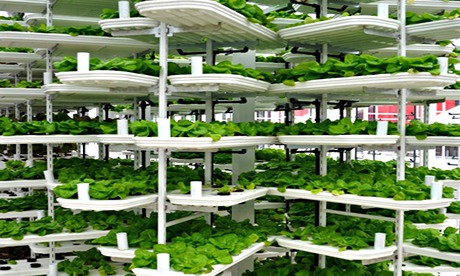
The oldest and perhaps most successful of such projects is Abalimi Bezekhaya (Farmers of Home), an inspiring urban agriculture organisation based in the Cape Flats townships. Founded during Apartheid in 1982, the venture assists thousands of individuals and groups from these barren, impoverished areas to set up and maintain home and community (shared) gardens on tiny fragments of city land so that they can cultivate their own juicy vegetables in their backyards. With a focus on organic micro-farming (sans chemicals and fertilizers), the enterprise, which provides training and start-up packs, looks to improve the hungry’s access to nutrient-rich, non-poisoned food that can supplement a very restricted diet.

“There’s absolutely no reason for food insecurity anywhere,” asserts Abalimi Co-director Rob Small, a charismatic man who firmly believes that the only major hurdle to keeping the poor full and fed is a deeply entrenched mindset that places no value on small-scale farming in built-up areas. “Just 100m2 can feed a family of four year round with all the fresh veggies they could dream of.”

But filling starving bellies isn’t the only aim of the association; it also seeks to use urban agriculture to generate income for the unemployed. Hence, Harvest of Hope, a social business under Abalimi that’s the first of its kind in SA, was established in 2008 with the aim of selling produce that’s picked from the community gardens to wealthier Cape Town customers. Verdant crates of fruits and veggies are delivered to drop-off points weekly, and a significant portion of the profits goes straight back into contracted gardeners’ pockets.

Through such a scheme, locals who aren’t inclined to nurturing their own nibbles can still reap the benefits by supporting local production – a practice that Rob feels is as, if not more, important than having every individual setting up their own little green patch.

Stephen Lamb, owner of Touching the Earth Lightly, an initiative that aims to reconcile humans and nature through design, shares this sentiment.

“People mustn’t plant plants, they must plant vegetables, plant food,” says the Cape Town designer-cum-environmentalist. “And if they don’t, they must buy from people that do.”

Alongside working on a broad array of other collaborative projects, Stephen has partnered with the City of Cape Town to pilot a rooftop gardening scheme in the City Bowl – there’s one at 44 Wale Street already – that will employ disenfranchised individuals to cultivate mushrooms and microgreens that are sold to restaurants and delis down below. Still in the planning phase, the programme will work to counter the huge carbon cost (and absurdity) of the city’s reliance on importing vegetables from areas hundreds of kilometres away, which is not only detrimental to the integrity of the produce – it sits in plastic in cold storage units for weeks – but also entirely unnecessary considering that there are, in the founder’s words, “acres of farm” in the form of empty, unused rooftop space in the otherwise crowded CBD.

Though this particular project is more focused on job creation than food security, in a similar way to Abalimi Bezekhaya, it also endeavours to empower Mother City dwellers, to cultivate a culture of people that are more connected to their food source and the life-giving soil beneath their feet, and to gently remind our disengaged generation that food comes from the ground, not from pricey supermarket packets.

“We get gifts from nature for free every day – we don’t pay for photosynthesis, for soil, for rain or any of the natural elements that make plants grow,” says Stephen, making a point to emphasise that, despite the way this observation sounds, he harbours no hippie ideologies. “So, we can choose to live our lives differently, we don’t need to buy into this consumerism lie which has everybody by the neck.”

That is, urban farming, he feels, is a movement that, apart from being super sustainable, can help residents to rekindle an appreciation for the wholesome, the transparent and the honest, and to return, on some level, to a slightly simpler way of being – “simple is cool, complex is easy,” he says.

Essentially, what Stephen seems to be espousing is a vision of a generation of self-reliant individuals that take more control of and responsibility for what they put in their mouths (rather than leaving it in retailers’ hands). In his perfect world, he sees Cape Town as an autonomous city that boasts a thriving local economy and a mass of well-nourished citizens that are as rooted, plump and healthy as the veggies they’re personally producing.

And fortunately, with a mushrooming number of sustainable food production projects now budding in the Mother City, this dream may not be such a distant reality. New instances, like the Oranjezicht City Farm, an inner-city organic garden on the slopes of Table Mountain, and Touching the Earth Lightly’s yet-to-be-launched Green Shack initiative, which will see vertical vegetable patches set up on the sun-facing walls of township quarters, are lending great weight to a very socially significant trend. 

So, food insecurity may still seem like an insurmountable issue to conquer, and, realistically, we may still rely on those elusive outside sources for fare for many years to come, but we can certainly take some comfort in the fact that the option of growing our own greens has the potential to harvest real change in our pretty fertile city.

Partnering with Harvest of Hope

Mother City residents interested in signing up for a weekly delivery of fresh seasonal veggies from Harvest of Hope can do so online via the organisation’s website (Harvestofhope.co.za). Patrons can choose between a small (8 items) or medium box (10 to 12 items) for R72 or R105 respectively, and these cartons, which overflow with anything from brinjals, carrots and salad leaves to green peppers, spring onion and spinach, are delivered every Tuesday to a number of collection points around Cape Town (listed on the site).

By Dayle Kavonic

Photo credits: ‘Harvest of Hope Veg Box’ by Patrick West for Abalimi.org.za and ‘Typical Community Garden on School Grounds’ by Abalimi.org.za.